Recently I had the pleasure of having dinner at an amazing little café/bistro in Pleasantville, N.Y. called Nevaeh, (that’s Heaven backwards) I found this excellent place through the Triumph Dining Gluten-Free Restaurant Guide. I was on my way to vendor at a conference and we were ready for dinner after the first leg of our trip.
I’ve had so many problems dining out that I mostly avoid it. Dining at Nevaeh was a completely different experience. Most of the dishes were gluten-free as well as dairy free. Everything was already cooked and stored in refrigerated cases and we got to look and taste before we ordered. These two fabulous chefs, knew their ingredients hands down and when I mentioned multiple food allergies they were able to instantly give me a run down of what I could eat.
The food was very high caliber, in my humble opinion, fine-dining quality! The seasonings were well-balanced without the high amount of salt that is often found in restaurant food. We also bought some food “to go” to supplement us through the weekend, which worked really well.
How fortunate for us that we were able to be served fine-dining quality food at a relaxed, everyday establishment. If you’re traveling through Westchester County it would be well worth your while to check out this wonderful gluten-free oasis.
Nevaeh Cuisine
146 Bedford Road
Pleasantville, NY 10570
www.Nevaehcuisine.com
Wednesday, December 1, 2010
Tuesday, September 28, 2010
My Student's Success!

I received this photo from one of my very industrious students. This photo was taken after a particularly complex cooking/baking session.
Back row from left:
Water Kefir, Kombucha Tea, Red Cabbage Sauerkraut with her new airlock jars, fermented tomato pepper salsa (I have to get that recipe from her.)
Front row from left:
Gluten-free sourdough pancakes, Mock rye gluten-free miniloaves and Buckwheat Buns.
This photo makes me just smile!
Tuesday, September 14, 2010
Sauerkraut Ice Cubes!
My friend, Cindy, wrote to me asking my opinion.
She said:
I have been a little too over zealous with fermenting and have MANY jars
in the refrigerator. I don't always have time to eat them so I took my fermented
vegetables and ran them through my hand juicer and use it as a
drink. Do you think the resulting juice could be frozen into ice cubes?
I told her I thought it was a great idea especially since the probiotics and enzymes will probably not be harmed by the freezing. She thought she might drop some of the kraut cubes into some veggie juice. I think that's also a great idea. Get the benefits of the raw veggie juice plus a dash of fermented benefits!
Then my mind raced towards this:
Imagine a Bloody Mary with a couple of sauerkraut ice cubes...Wow!
Tuesday, August 24, 2010
Post Dental Surgery Food
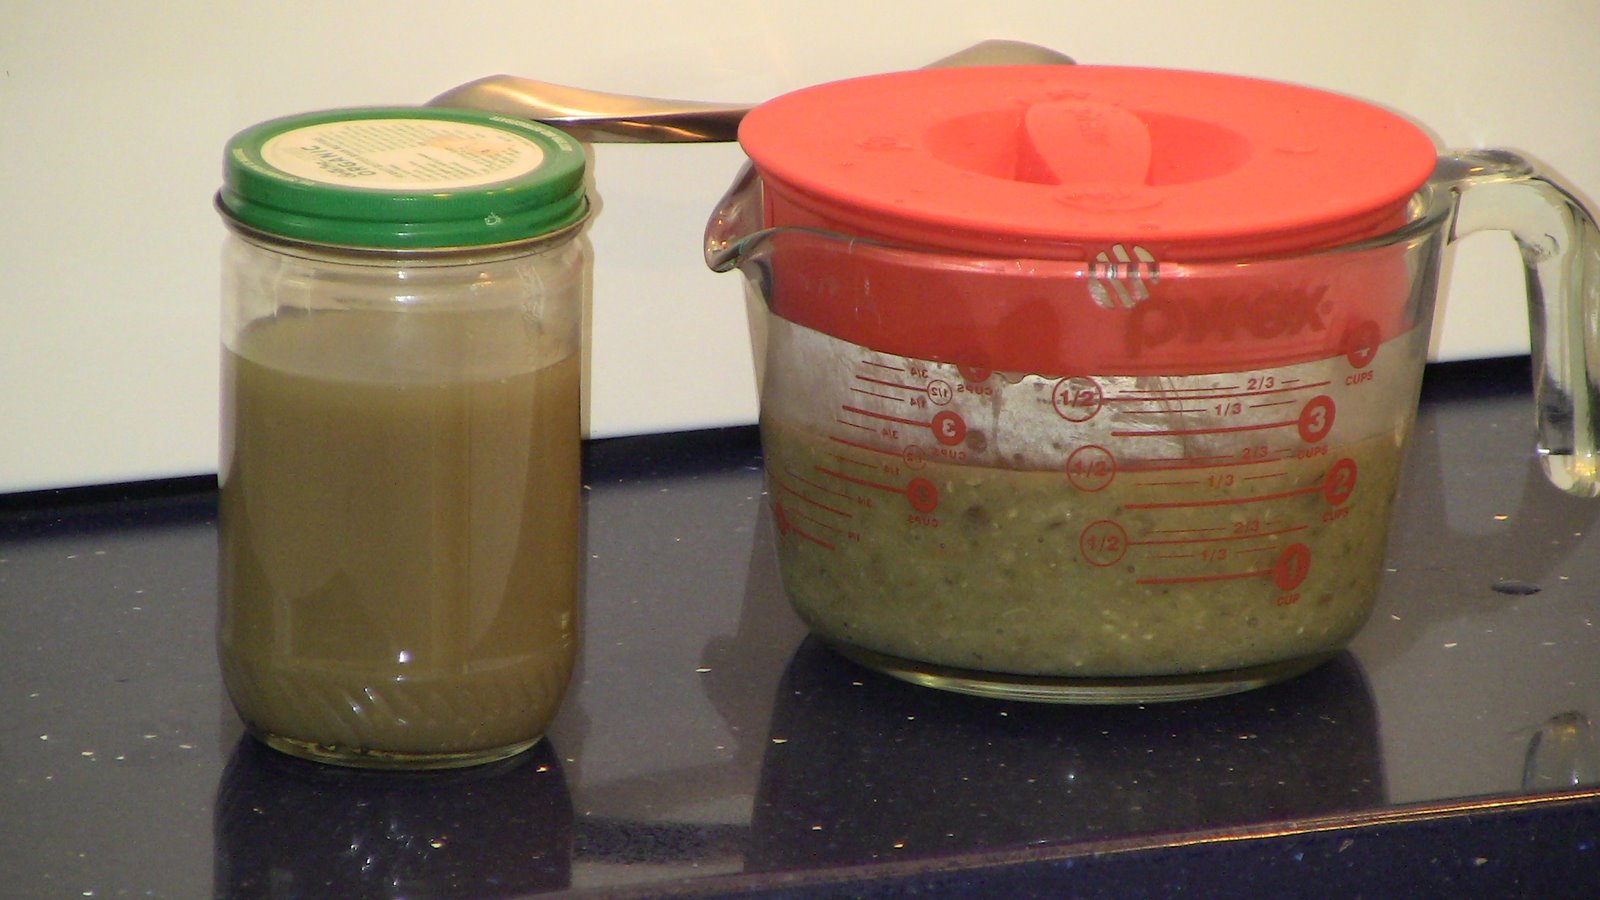
I recently had some dental surgery and planned in advance to make sure I would have some good meals for the days following the surgery. I had to eat very soft food for at least two days. I was able to use some of the contents of my freezer to put together an excellent soup:
-chicken stock
-rice congee
-lentil stew
I also added some fresh summer squash to the pot.
I simmered everything together, let it cool, and then spooned out the solids into the blender.
I whirred it all in the blender and had a nutrient dense, soft, mushy soup that lasted me the two days until I could chew again.
I also put the stock in a separate jar because I felt sure I might need a potent but liquid pick-me-up at some time, which I did.
Since I couldn't have any hard nuts or seeds for a week, for breakfast, I mixed almond butter into my cooked amaranth.
And for snack I had a slice of my gluten-free sourdough Teff Coconut bread toasted and steeped in a bowl of almond milk to turn it into a mushy pudding. It was really quite good!
With a little preparation I was able to eat just as well post surgery as I do everyday.
Here are the photos during preparation:


Wednesday, August 18, 2010
Marinated Heirloom Tomatoes

We have had some excellent heirloom tomatoes coming ripe this week. I marinated them in olive oil, kombucha vinegar, salt, pepper, dried thyme, and fresh fennel. I froze some of it for future bean pots and stews.
Saturday, August 7, 2010

Monday, May 24, 2010
Flavored Water Kefir : Rhubarb-Rose Petal

I love the taste of plain and simple water kefir made with water kefir culture, sugar, water, raisins and lemon. Now, I'm starting to experiment with flavored water kefir using a second ferment after the first water kefir ferment is complete. I've read about people doing second ferments with fruit juice, fruit, coconut water, and ginger for a sweet soda-like drink. I'm looking for something with a bit of a bite:
Rhubarb Rose Petal Water Kefir
Ingredients:
1 stalk of raw rhubarb
20 rose petals from beach roses
2 sprigs of lemon balm
1 horseradish leaf,
1 1-inch hunk of ginger root
5 raisins
Directions:
Pour slightly less than a quart of fresh water kefir into a quart jar.
To get more flavor I chopped the rhubarb into 2 inch long pieces and split them down the middle. I also sliced the hunk of ginger so that lots of ginger was exposed.
Put all the ingredients into the jar of water kefir.
Push it under the water kefir, cap it and set it on the counter.
Let it ferment for 24 hours and then refrigerate it.
I'll keep my eye on it during those 24 hours to make sure there isn't too much carbonation build up and if there seems to be I'll open the cap to release it.
Some people like a strong carbonation but I like just a little.
Tomorrow I'll taste it but I'll probably let it steep in the fridge for a few days before officially drinking it.
I'll report back about it.
Sunday, May 16, 2010
Can One Overdose on Onions?

Today I had 3 forms of onions in one meal. Walking Onion flower stalks, Green Garlic stalks and Fermented Walking Onion greens. I wondered if it was possible to eat too much onion but went ahead and ate them anyway.
I have been harvesting onion greens since the early spring emergence of my perennial Walking Onions. I eat them raw, snipped in salads and stop eating them this way when they get too tough or to hot.
Last week I experimented with a few thick handfuls of Walking Onion greens by putting them in the blender with a little salt water brine until they became mush. I jarred them and fermented them on the counter for 3 days and stored them in the fridge for the rest of the week.
As I prepared to make dinner I went out to the garden to harvest what was available, which was very little because it’s only May 16 and I live in New England.
Since I had been chipping away at the Walking Onion greens I decided to harvest some of the plants whose greens were already eaten but were sporting thick flower stalks. I pulled out entire plants including the small onion bulb as the plot needed to be thinned a bit, anyway.
I also harvested some of that Green Garlic I spoke about in my last post.
Heading back to the kitchen I started peeling, chopping, cleaning and sautéing the Green Garlic and Walking Onion stalks in olive oil. I added sliced chunks of swordfish to the mix.
For salad I harvested various lettuces, escarole, a lone asparagus stalk, and small but potent radishes.
I sampled the Fermented Walking Onion greens and found a pleasant aroma upon opening the jar. They tasted sweet, sour, salty, delicate and like nothing I ever had before.
I added some fermented Walking Onion greens on top of the salad as a condiment.
Dinner was fantastic and all the veggies were from the garden!
Tuesday, May 4, 2010
The Green Garlic Patch
I continue to ponder Garlic Leeks which I recently realized are conventionally known as Green Garlic. My husband is the official vegetable gardener in our family. He treats everything with proper care: weeding, mulching, feeding, watering. I on the other hand am more of a throw-it-in-and-see-what-you-get type of gardener. If it can survive in my garden, I know it's strong.
In my last post, Garlic Leeks, I wrote about eating the stalks of garlic bulbs that were missed in the harvest. They were really superb! And so much more to eat than in a clove.
Last fall after we planted a bed of garlic I decided to plant a bed for myself using some of the previous year's garlic bulbs that we never got to eat. They were getting soft and drying out but some were sprouting. I separated most of them and planted them in close rows in my herb patch. A few bulbs were tiny and not having the patience to separate them, I just planted the whole bulb.
I wanted to see if they would grow at all. This spring I have a healthy patch of garlic plants, certainly not of the size and caliber of the plants in the official, well-taken-care-of bed, but certainly good enough size to eat as stalks sauteed with other veggies. The tiny whole bulbs that I planted are a cluster of skinny greens that I will separate and replant when I have a minute.
Another benefit of these stalks is that we can eat them so early in the season because they've wintered over and sprout early in the spring. We've been eating them for about 3 weeks and it's only early May! For New England that's almost a miracle! I'm curious to see how long they will stay tender.
I like the idea of having a garlic patch for stalk eating and another patch for bulbs to cure for the fall and winter. It seems to me to be a good use of space yielding more food in the end.
Wednesday, April 21, 2010
Garlic Leeks
After the snow melted and the spring rains came we saw a handful of garlic stragglers missed during the previous harvest. We let them grow to about12 inches and pulled them out to inspect. The bulb had self divided and each mushy clove had a strong, thick leek-like stalk growing out of it. Never one to waste anything I decided to try and eat it.
First I chopped off the mushy clove and roots. Then I easily peeled off the outer layer down to a clean layer. I cut off about 8 inches of coarse leaves. This left a 5-inch juicy looking stem that I chopped and used in a sauté which was absolutely fabulous!
I was able to use the remainders, as well. I removed the mushy cloves and popped them into the compost. I washed the coarse leaves and soaked and rinsed the roots. These went into my freezer container for future soups.
Monday, March 15, 2010
Liver Pate', dairy free
I have been eating too much peanut butter and peanuts for snacks. I know this because I’m starting to feel tired and/ or warm after eating them. I know how important rotating one’s food is but I’ve fallen into an easy habit of reaching for a slice of my gluten free sourdough bread with peanut butter or peanuts. After becoming sensitive to so many foods I’ve eaten repetitively I now know the signs of encroaching sensitivity.
I decided to try making a liver pate to spread on my bread. I used spices traditionally used for pate’ while adding a few of my own. Many of the pate’ recipes use very large amounts of butter or animal fat to make the pate’ set up. I only wanted to use a modest amount of animal fat plus I added some olive oil. I try my best to grind spices right before I use them. I was very happy with the result which is actually somewhere between a traditional chopped liver and an artisanal liver pate’:
Liver Pate’
Yield: about 3 cups
Ingredients:
1 pound calves liver, membranes removed
4 tablespoons fat or mixture of fat and olive oil
1 large or 2 medium onions medium chop
2 cloves garlic medium chop
1 teaspoon paprika
½ teaspoon coriander
½ teaspoon mace
¼ teaspoon allspice
¼ teaspoon cardamom
¼ teaspoon cumin
1 teaspoon dry mustard
¼ teaspoon rosemary
1-3 teaspoons dried sage
1-2 tablespoons fresh squeezed lemon juice
2 tablespoons kombucha tea or kombucha vinegar or any wine or wine vinegar
Salt
Black pepper
Directions:
Heat fat and oil in pan, add onions and garlic and cook a few minutes
Meanwhile grind spices and add to onion mixture
Stir to mix spices
Salt and pepper the liver and to pot
Add lemon juice and kombucha vinegar
Simmer till liver is done, about 10-15 minutes
Let cool
Remove any other tough membranes
Put entire mixture into the food into food processor and process till smooth.
Test for seasoning, add more salt and pepper if necessary and briefly process once more
Serve right away or pour into mold or loaf pan and chill before using
Keeps about a week.
Subscribe to:
Posts (Atom)


